Shop Minis Extensions
This documentation is outdated and only applies to partners with existing Minis. Please check back soon for new platform announcements.
Shop Minis Extensions are a way to surface your Mini in the Shop app. They offer the following benefits:
- Extensions are flexible. Model your data however you want using Shopify custom data primitives like metafields and metaobjects. If you're already using metafields and metaobjects for your Shopify app, you should be able to use the same ones for your Mini too (with some limitations).
- Extensions are dynamic. You can write custom client-side code to determine whether or not the extension should render, based on any data about the current entity, including any metafields or metaobjects you have attached to it.
- Extensions allow inline functionality. Extensions are able to perform certain inline functions, such as handling user interactions or adding items to the cart, as well as opening a viewer to enter into the Mini experience.
- Extensions are customizable. Partners can contribute with new functionality to existing extensions, fork extensions to change how they work, or contribute entirely new ones.
Shop Minis Extensions are merchant-scoped, surfaced on a merchant's Shop store, product or order screen. Installed by Merchants via your Shopify app.
Anatomy of an extension
An extension consists of:
- A target.
The target configuration determines where your extension will be rendered in the Shop app.
For example
shop.product.variants.render-before. - A GraphQL input query. This query selects whatever data you need from the target resource (e.g. product) including core fields as well as metafields and attached metaobjects.
- A React component. This component takes the data from your input query as a prop and decides what UI to render (if anything).
Extensions may only render UI components from the @shopify/shop-minis-ui-extensions package.
Getting started
Create an extension
Requirements
- You have created your Mini using the Shop CLI.
- You have setup your Mini to generate an API key.
Link your Mini to your Shopify App
npx shop-minis app link
This will ask you to select a Partner account and then a Shopify App.
?  Select your organization:
✔  Your Selected Partner Account Name

?  Select your app:
>  Your Selected Shopify App Name
This will update manifest.json with the Shopify App ID.
  ...
  "shopify_apps": {
    "development": [
      123
    ]
  }
  ...
Make sure your Shopify App is installed in your Development store.
Steps
- Run the following command inside of the Mini you created using the Shop CLI.
npx shop-minis create-extension
- Select the appropriate extension target where your Mini will be shown (e.g. Product Page - Before Variants Picker).
Product Page - Before Variants Picker
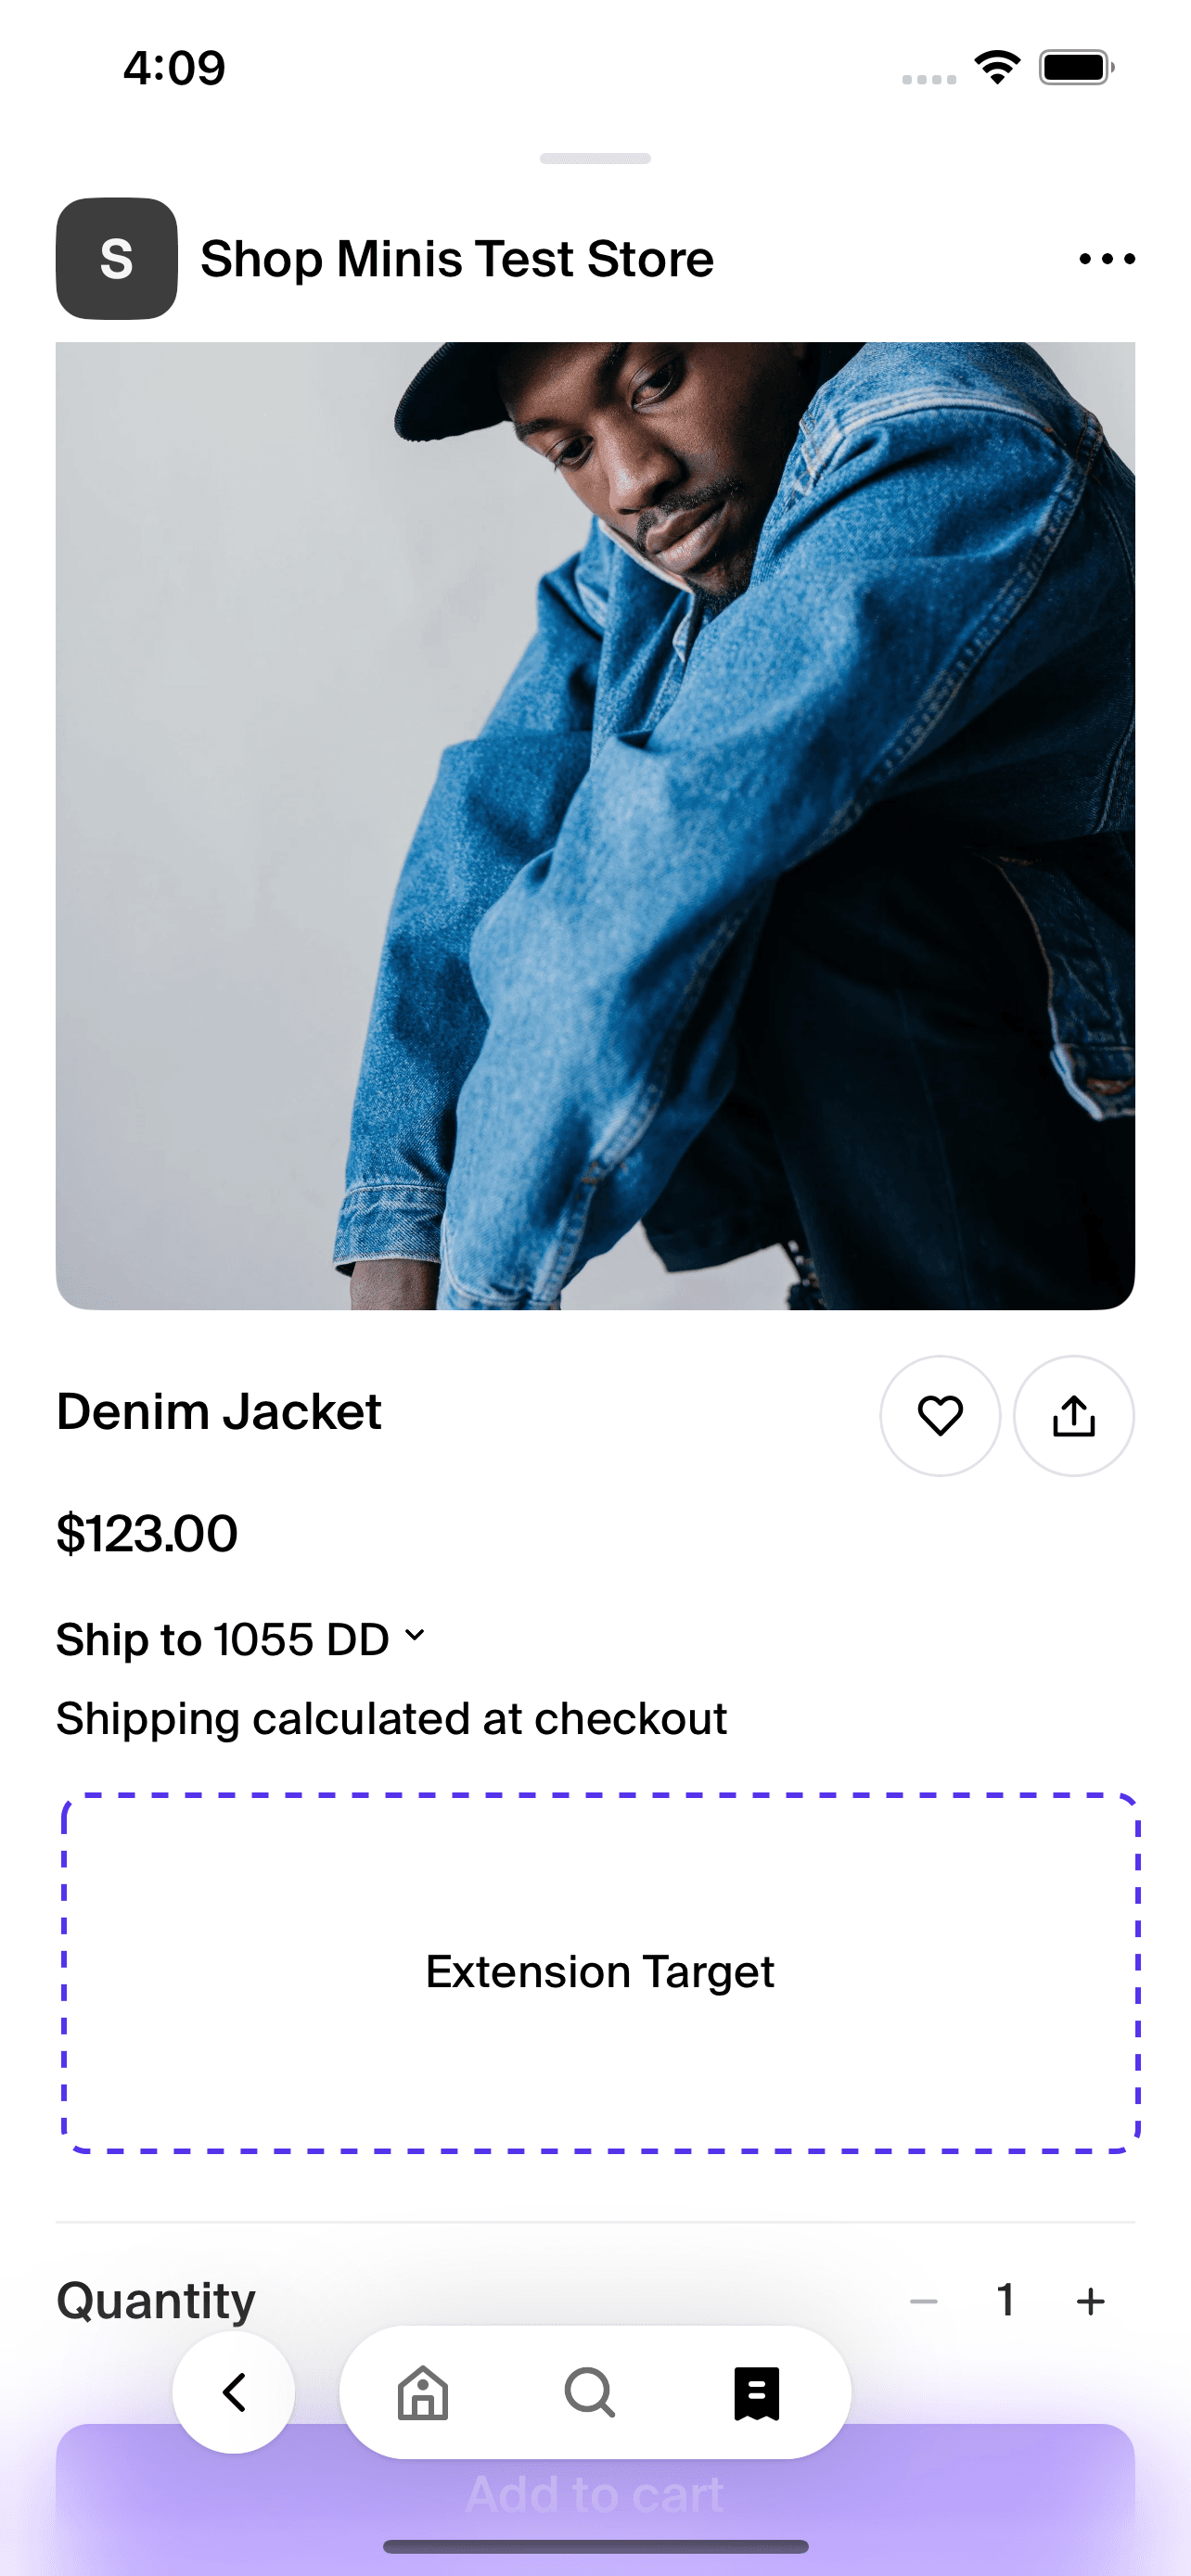
shop.product.variants.render-beforeProduct Page - After Description and policies
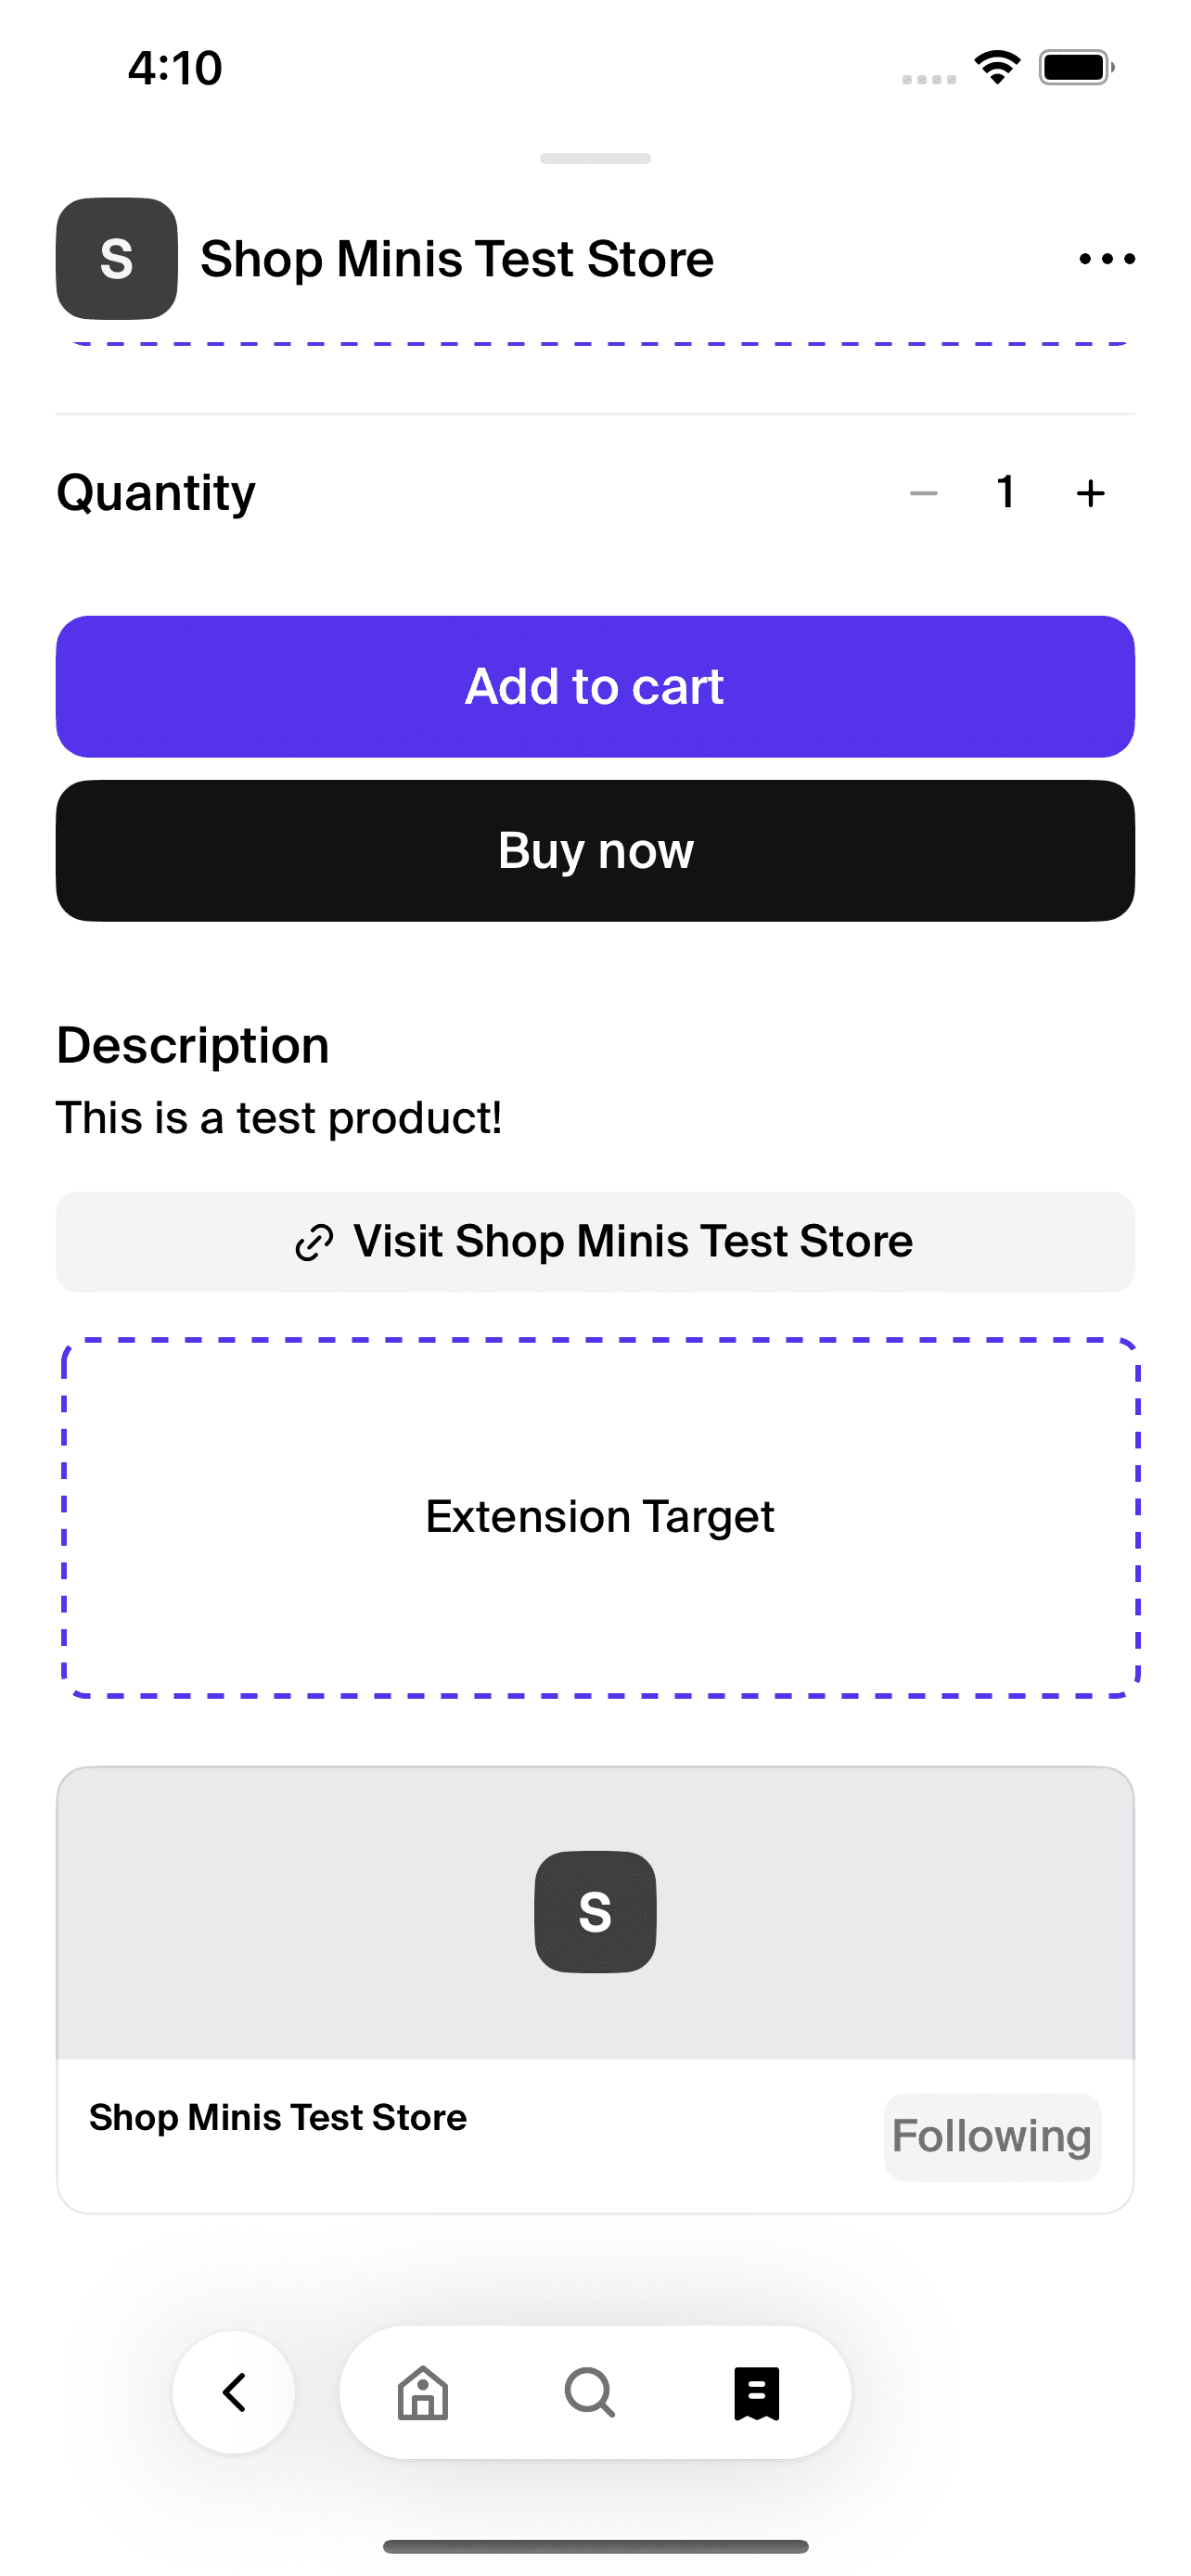
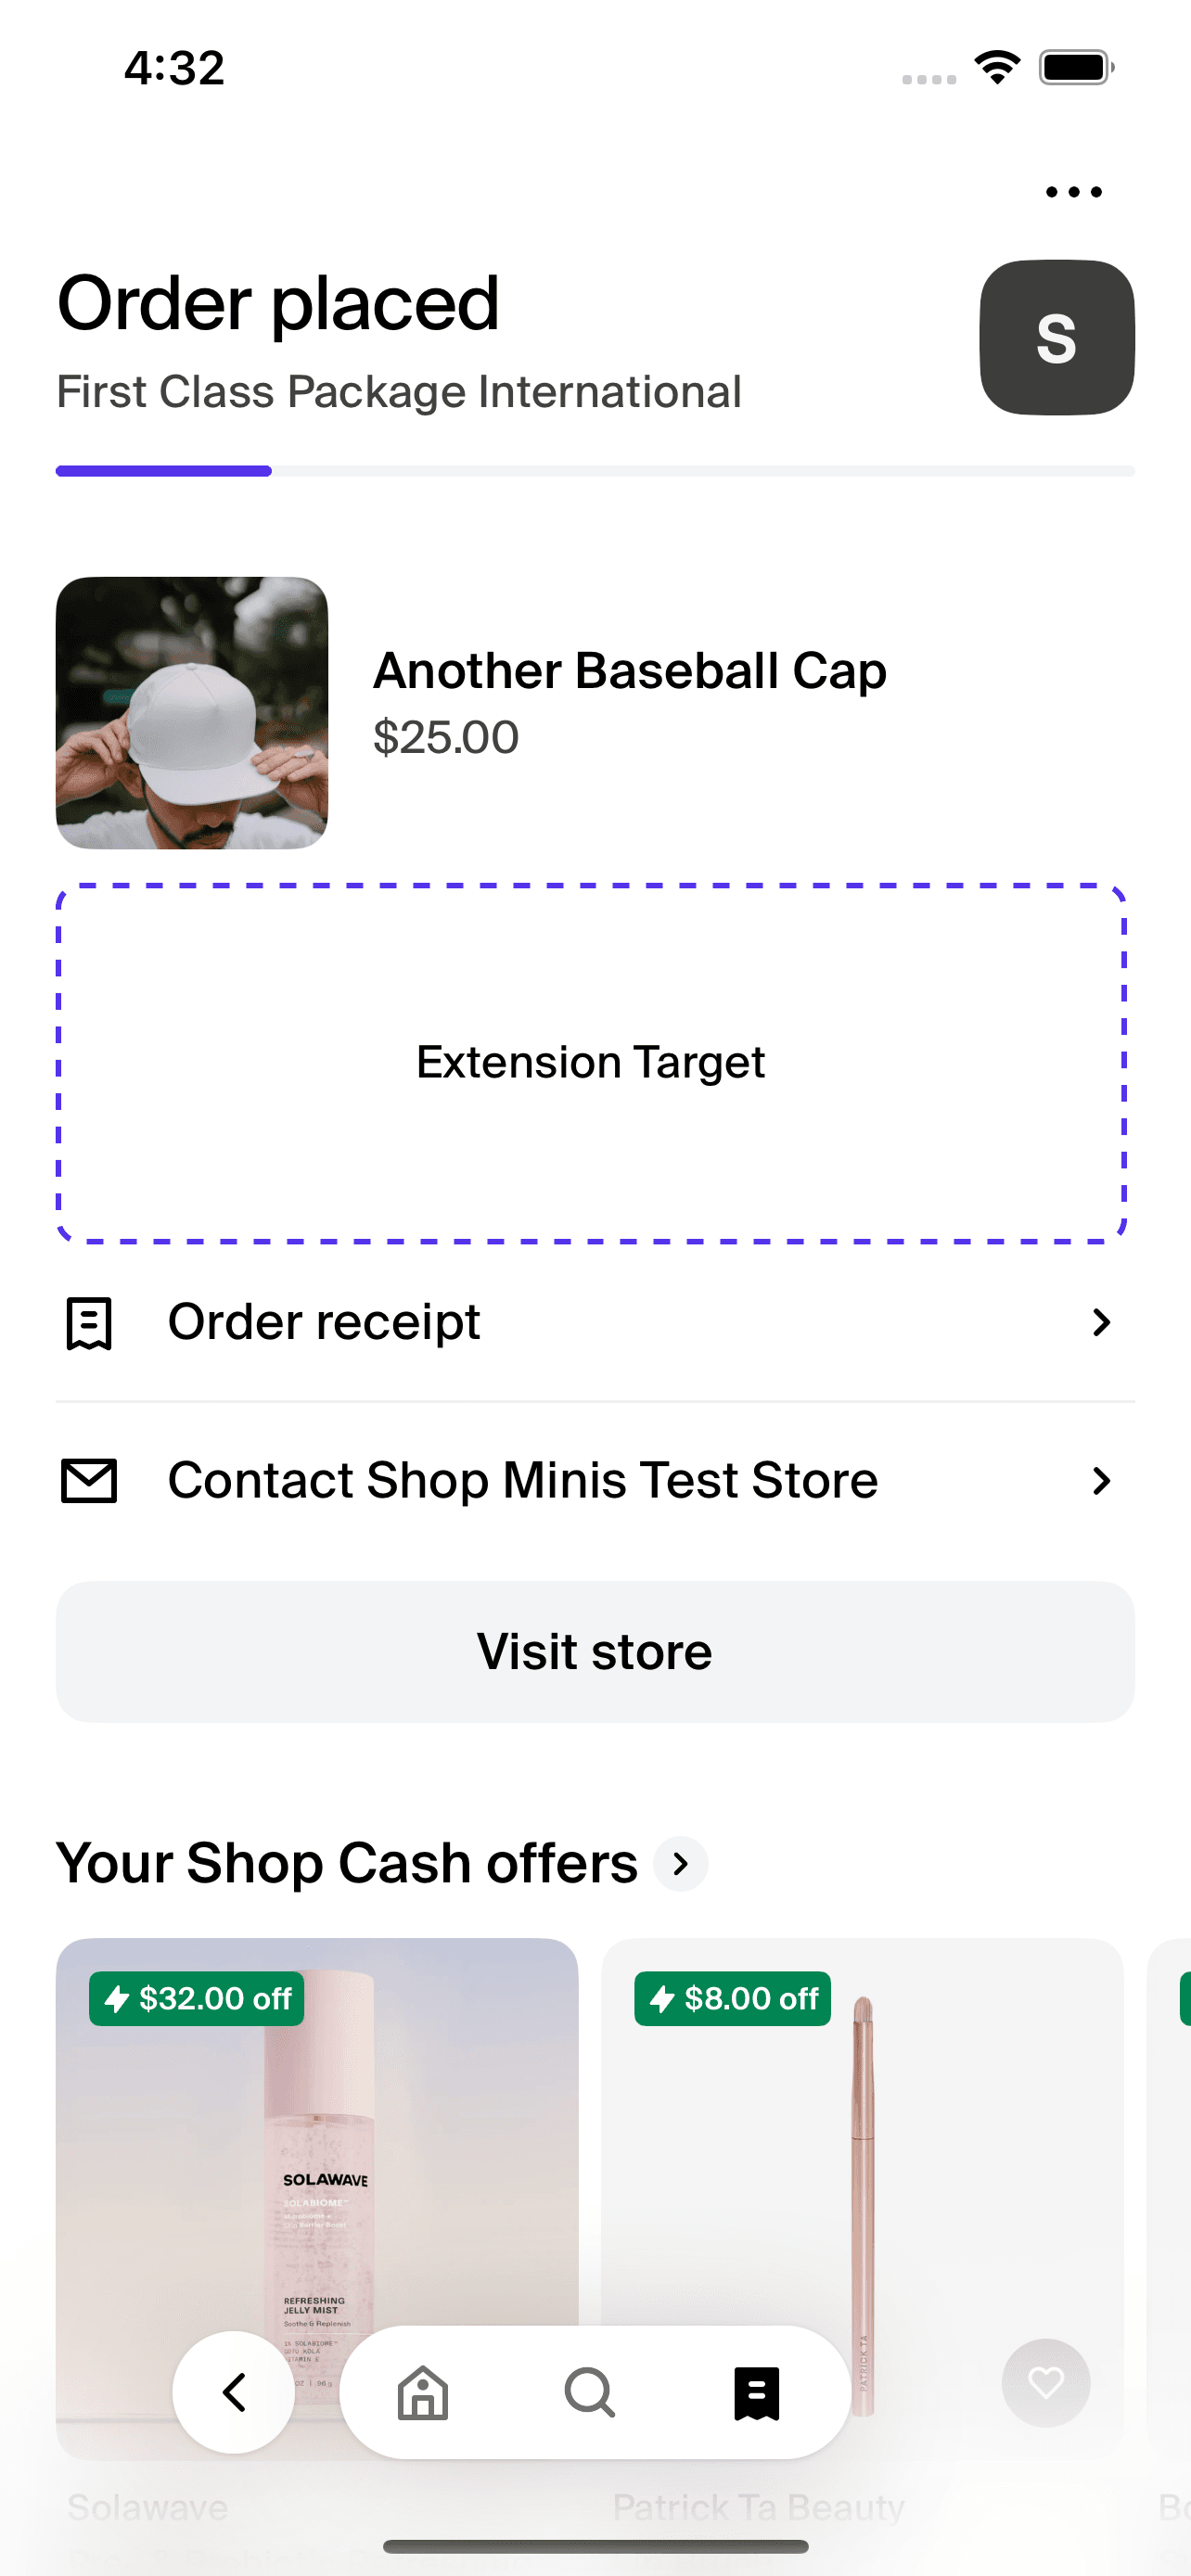
shop.product.policies.render-afterOrder Management Page - After Order Details
shop.order-management-page.order-details.render-afterOrder Management Page - After Visit Shop Button
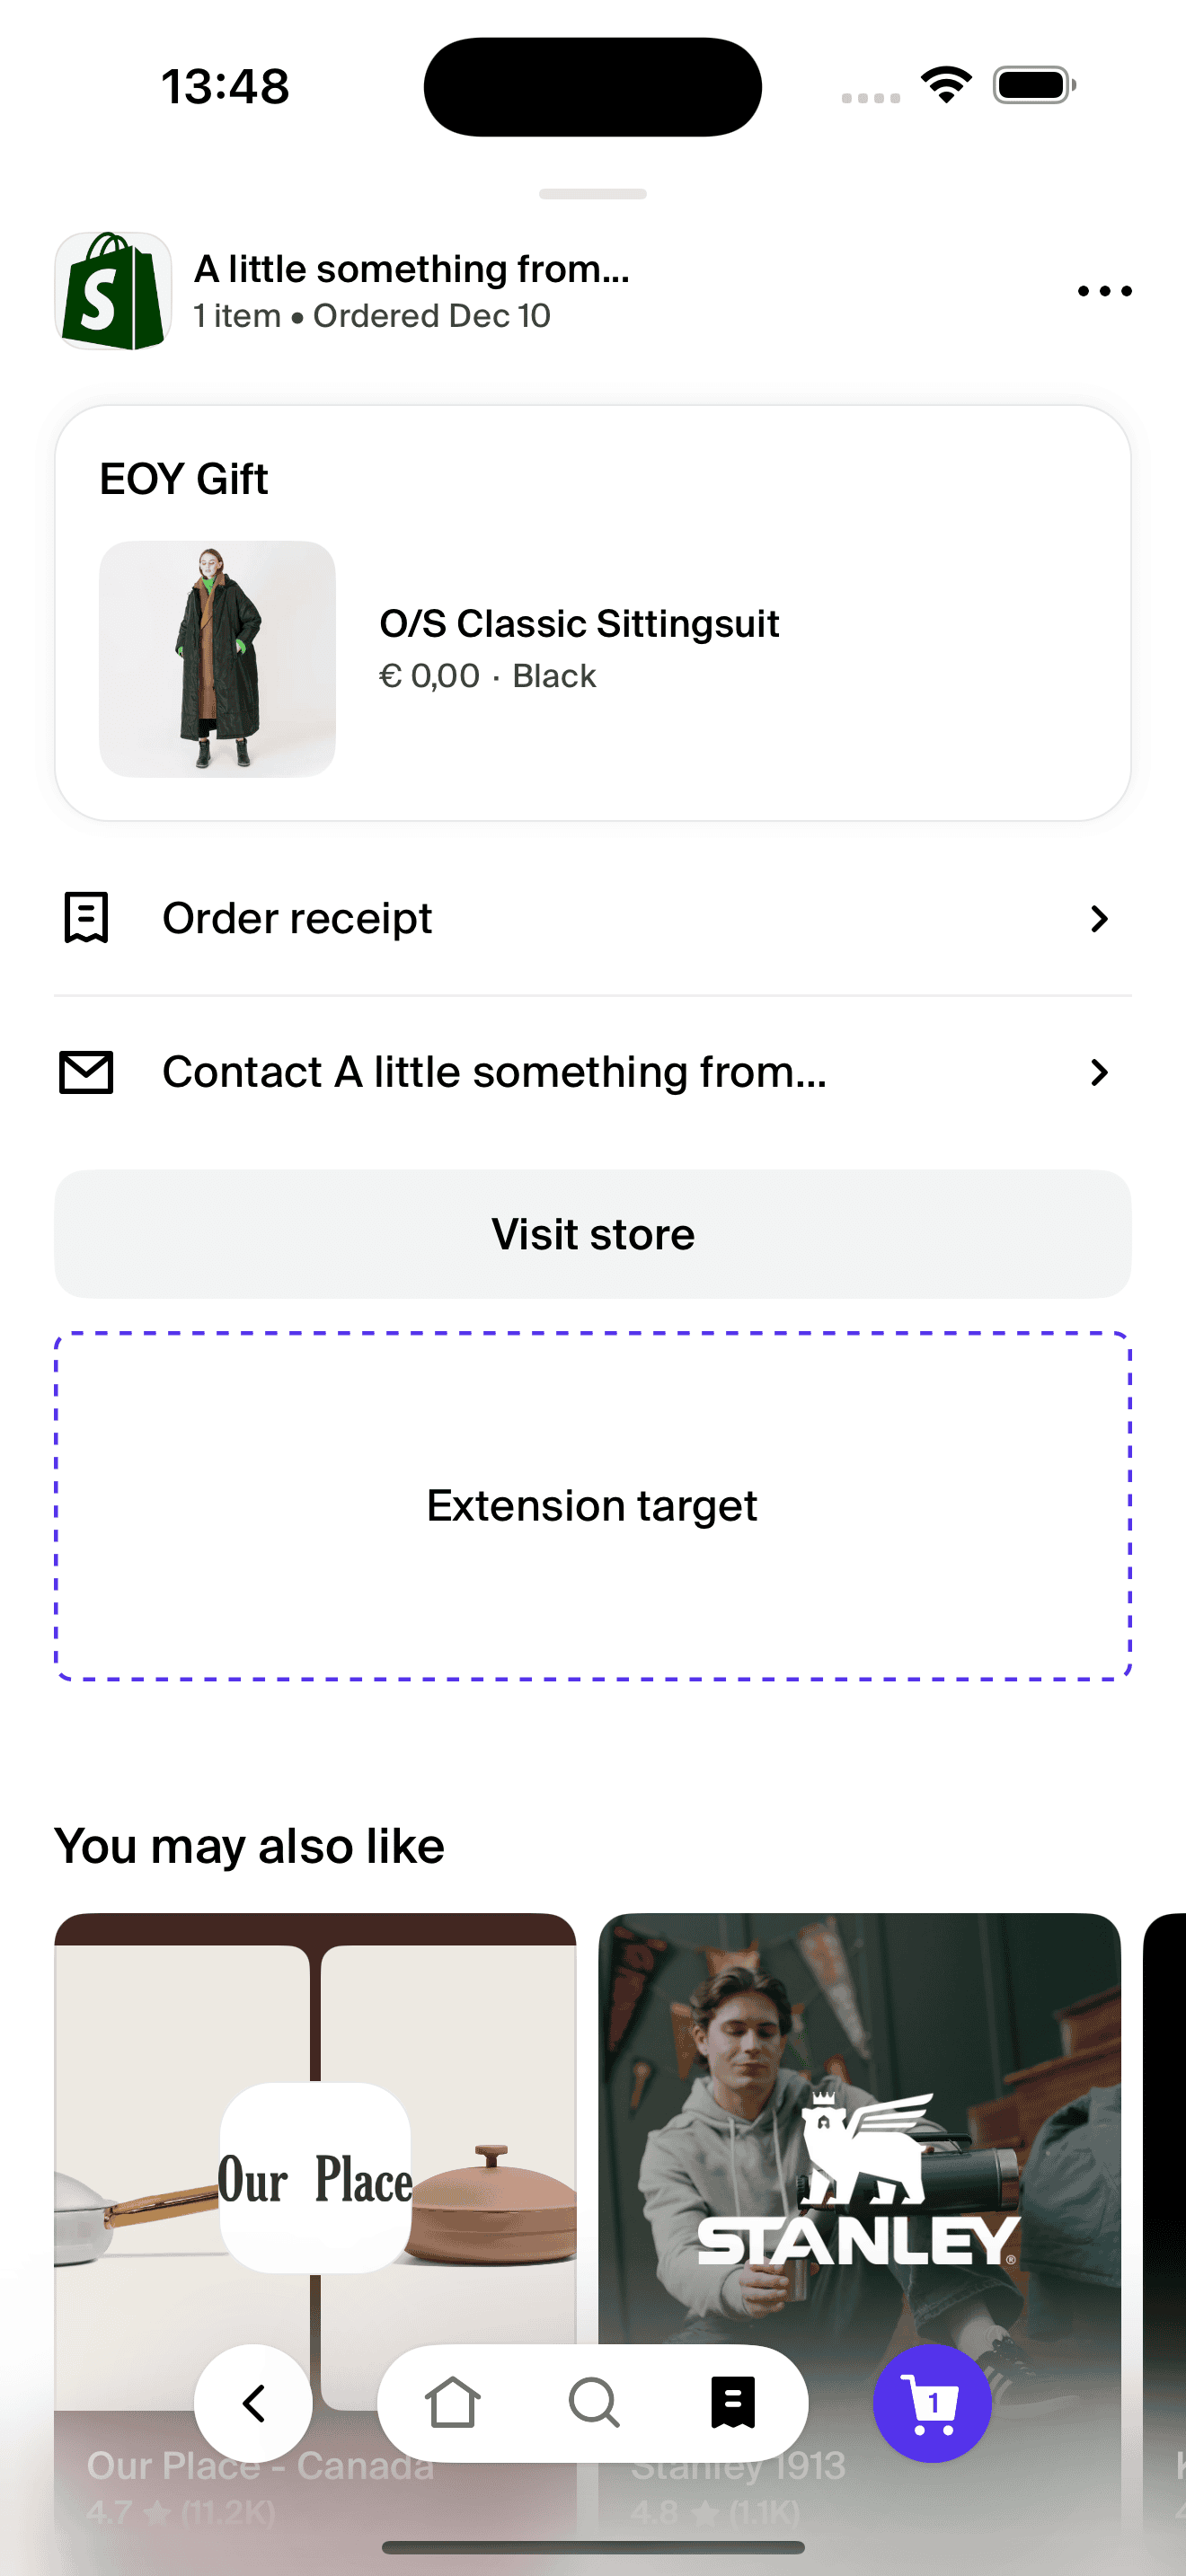
shop.order-management.visit-shop.render-afterOrder Confirmation Page - After Order Details
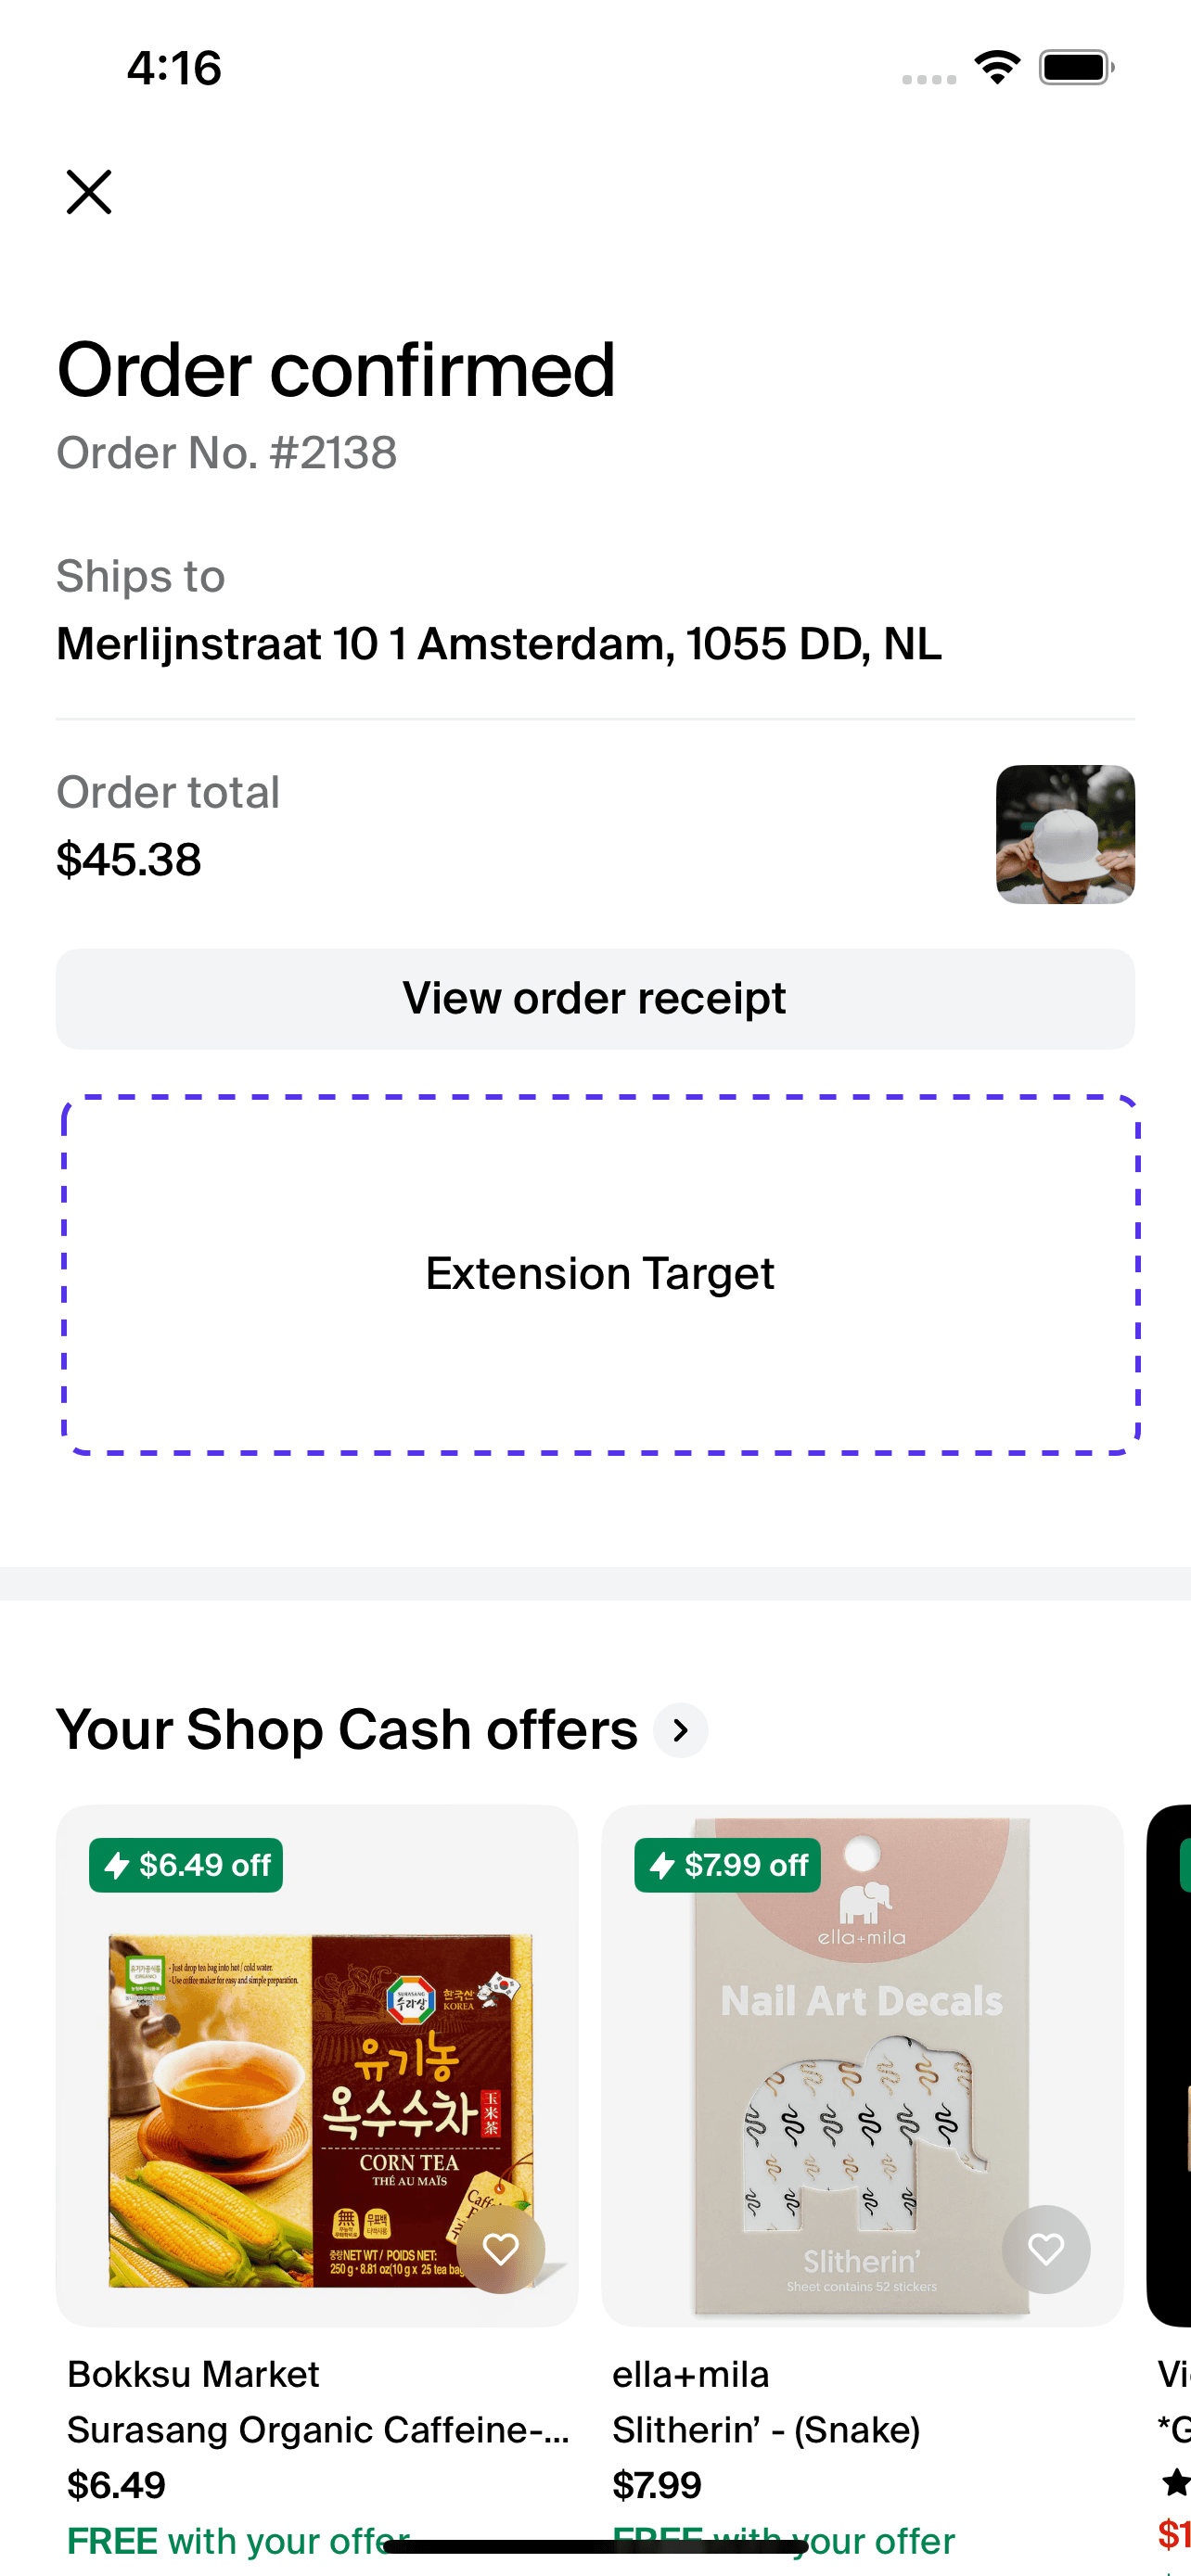
shop.order-confirmation-page.order-details.render-afterStore Page - Default
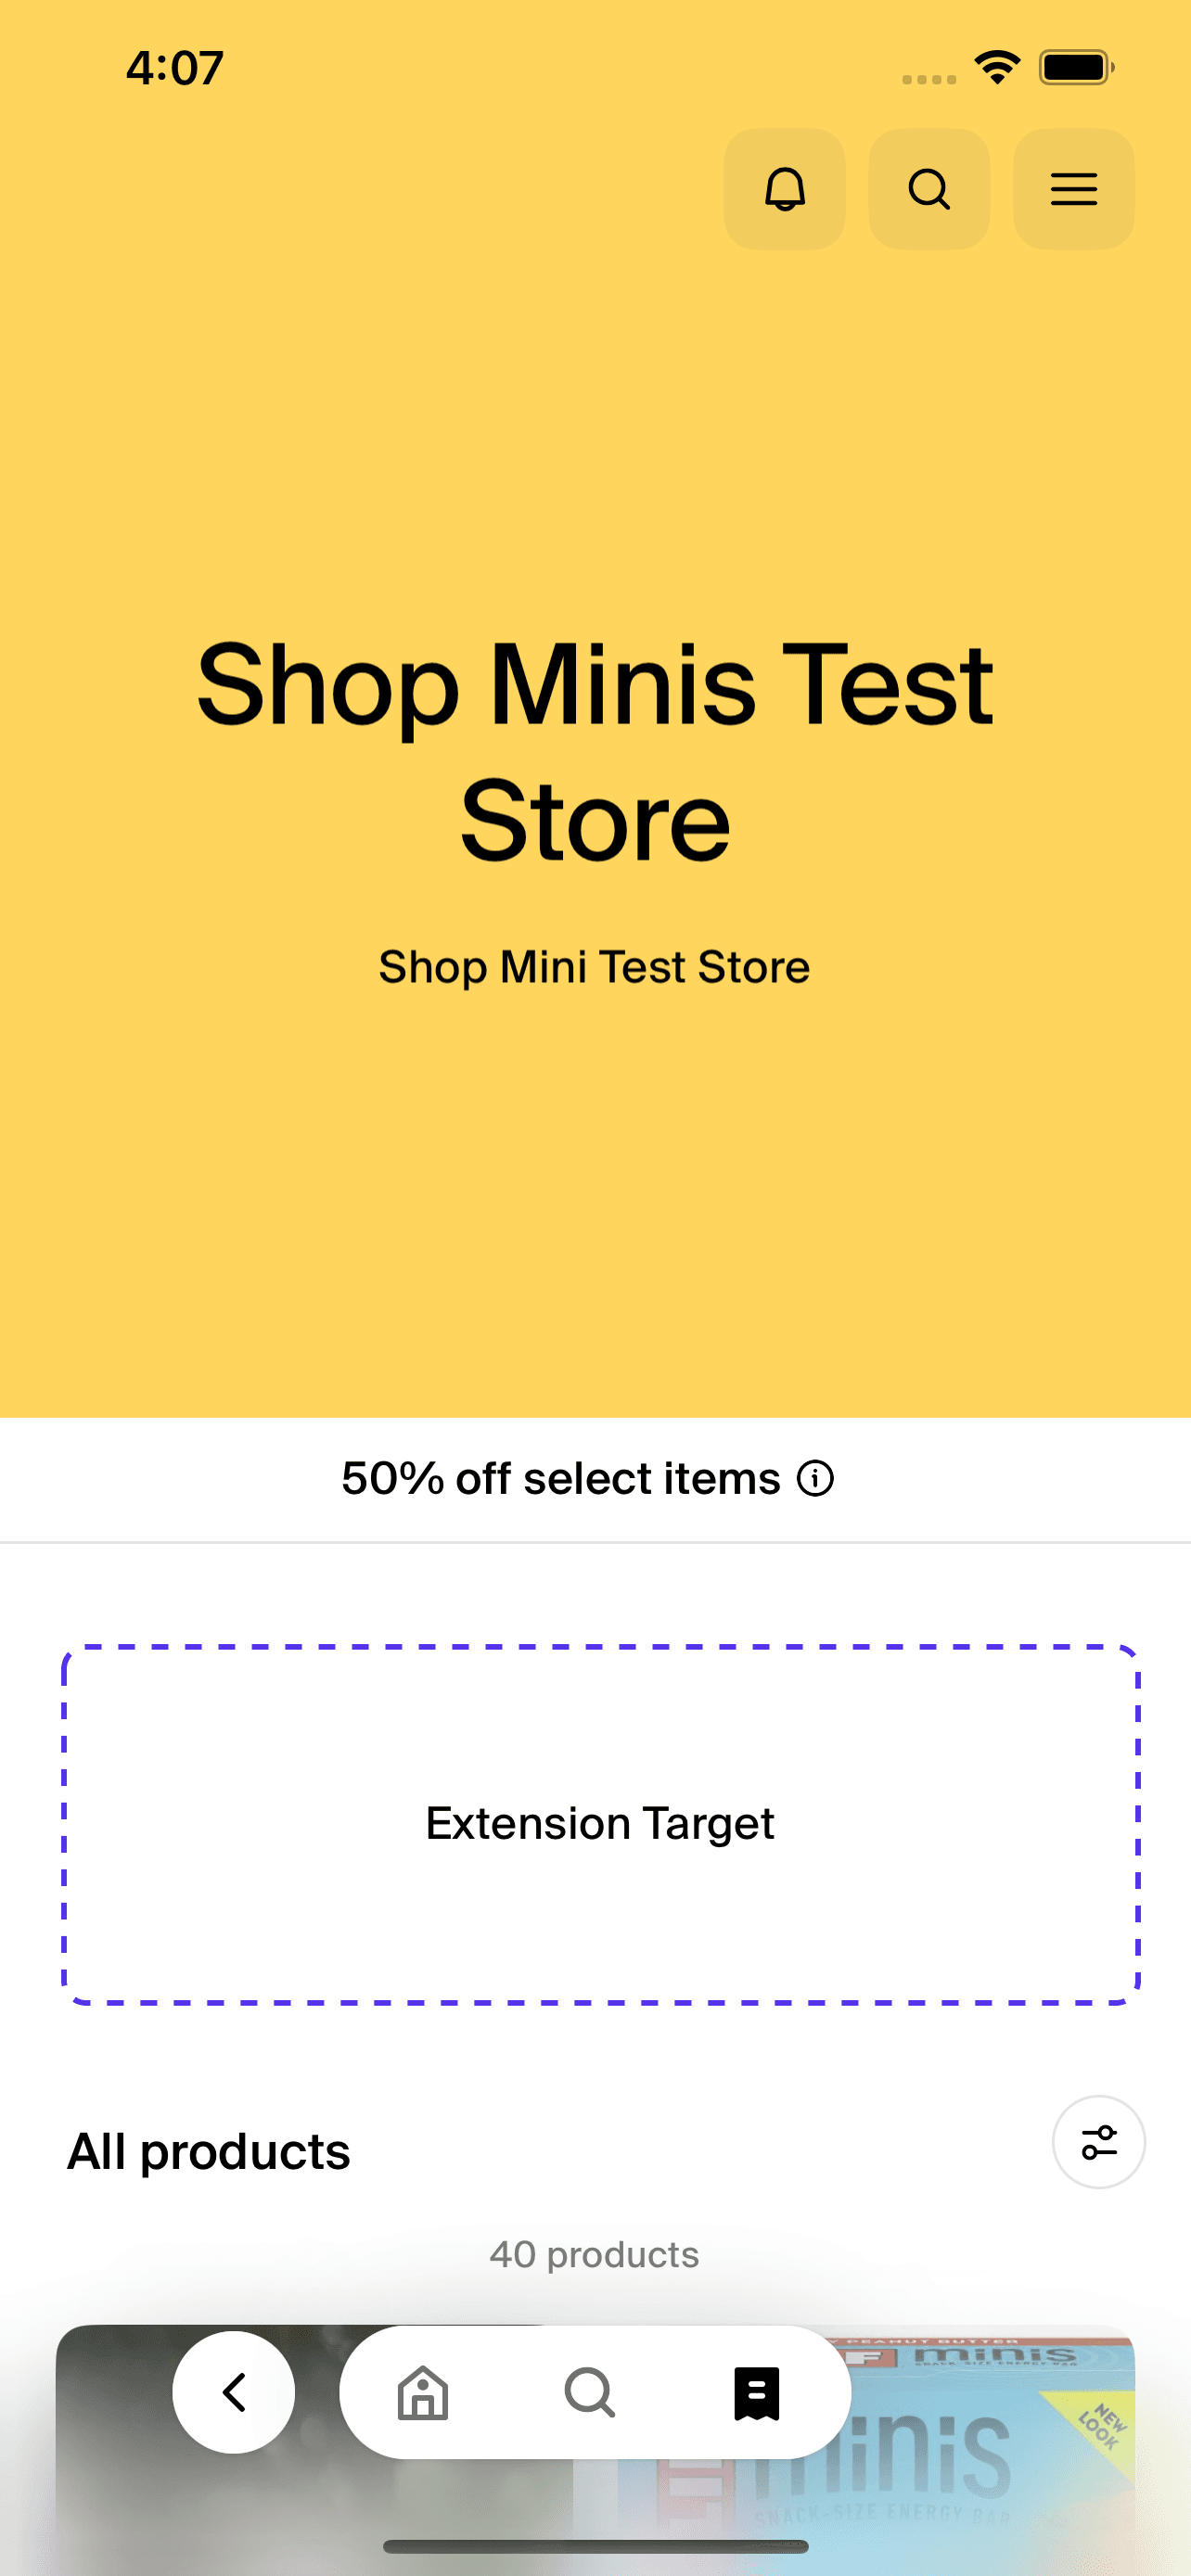
shop.store-page.block.render-after$ npx shop-minis create-extension
? Select the extension target where your Mini will be shown. You can check more details here: https://shop.app/minis/docs/extensions/introduction/#steps:
> Product Page - Before Variants Picker
Product Page - After Description and policies
Product Page - Default
Store Page - Default
Order Confirmation Page - After Order Details
Order Management Page - After Order Details
Order Management Page - After Visit Shop Button
- Select the appropriate component/type of extension you want (e.g. Bundle Selector).
$ npx shop-minis create-extension
?  Select the extension target where your Mini will be shown:
✔  Product Page - Before Variants Picker

?  Select the type of extension you want to create:

   Blank
   Link
   Default Card
   Image Collection
   Video Collection
>  Bundle Selector
   Bundle Collection
   Bundle Upsell
You can now start developing your extension by running npx shop-minis dev.
╭─ success ──────────────────────────────────────────────────────────────────────────╮
│                                                                                    │
│  Extension created successfully                                                    │
│                                                                                    │
│    • Your extension was created at:                                                │
│      src/targets/shop.product.variants.render-before                               │
│    • Your minis config file was updated                                            │
│    • @shopify/shop-minis-ui-extensions could not be installed                      │
│                                                                                    │
│  Next steps                                                                        │
│    • To start your mini with your new extension, run:                              │
│       `npx shop-minis dev`                                                         │
│                                                                                    │
╰────────────────────────────────────────────────────────────────────────────────────╯
This steps will generate the following files, depending on the type of extension you selected and the target. The available targets are:
src/targets/shop.product.variants.render-before/render.tsx
import {useEffect, useState} from 'react'
import {
  BundleSelector,
  BundleSelectorItem,
} from '@shopify/shop-minis-ui-extensions'
import {useExtensionShopActions} from '@shopify/shop-minis-platform-sdk/actions'

import type {ProductVariantsRenderBeforeQueryData} from './input.graphql'
import seedData from './seed'

export function Render({
  extensionData,
}: {
  extensionData: ProductVariantsRenderBeforeQueryData | null
}) {
  // Here we are using seed data to populate the initial state of the bundle selector.
  // You can replace this with the actual data from `extensionData`
  console.log('Product data from input query:', extensionData?.product)
  const initialBundleSelectorItems: BundleSelectorItem[] = seedData
  const [bundleSelectorItems, setBundleSelectorItems] = useState(
    initialBundleSelectorItems
  )

  const {updateLineItemAttributes} = useExtensionShopActions()

  useEffect(() => {
    if (!bundleSelectorItems) return

    const lineItemAttributes = bundleSelectorItems.map(
      item => item.options.find(option => option.selected)?.value
    )

    updateLineItemAttributes({
      lineItemAttributes: [
        {
          key: '_component_reference',
          value: JSON.stringify(lineItemAttributes),
        },
      ],
    })
  }, [updateLineItemAttributes, bundleSelectorItems])

  if (!bundleSelectorItems) return null

  return (
    <BundleSelector
      items={bundleSelectorItems}
      onChange={setBundleSelectorItems}
    />
  )
}
src/targets/shop.product.variants.render-before/input.graphql
query ProductVariantsRenderBefore {
  product {
    id
    title
  }
  shop {
    id
  }
}
Building your extension
Retrieve custom data
Partners can retrieve custom data for products, stores, or orders using metafields in Shop Minis extensions. This feature allows you to model and fetch custom data that suits your specific use case. Here are some key points to keep in mind:
- Metafields can be used to store various types of content, including references to other Shopify resources.
- For products and shops, metafields must have
storefrontaccess set toPUBLIC_READ. - For orders, metafields must have
customerAccountaccess set toREAD. - You'll need to create metafield definitions using the default namespace (scoped to your app).
- Metafields can also reference metaobjects, allowing for more complex custom data models.
It is not permitted to make network calls to fetch custom data within an Extension. Network access is only allowed after user interaction, such as tapping on a button. Extensions can only access data provided through the GraphQL input query.
Here's a simple example of querying a product metafield:
query {
  product {
    relatedProduct: metafield(
      namespace: "app--12345--foo"
      key: "related-product"
    ) {
      reference {
        ... on Product {
          title
        }
      }
    }
  }
}
When developing your extension, be sure to model your custom data carefully and only fetch what is necessary to render the extension component. This will help minimize the performance impact of your Mini on merchants' surfaces.
For more detailed information on using custom data in Shop Minis extensions, including examples of querying metafields and metaobjects, please refer to the comprehensive guide Using custom data.
Rendering the extension
The render.tsx function in your extension can only return components from the @shopify/shop-minis-ui-extensions library. This ensures consistency and performance across all extensions in the Shop app.
If the current components in the @shopify/shop-minis-ui-extensions library don't meet your needs, you have the option to create new extensions. To do this, you should follow the guidelines provided in the shop-minis-ui-extensions repository. This allows you to contribute new components that can be used by your extension and potentially by other developers in the future.
Test your Mini
If you are already a partner, make sure you have setup your Mini
before attempting to test your extension.
A handle in your Mini's manifest.json file indicates that your Mini is already registered.
Running your Mini
Run the following command in your minis folder to test your Mini in a simulator or on your device:
npx shop-minis dev --extension-targets=<your-extension-target>
Replace <your-extension-target> with the name of the target you chose for your extension,
the name should be name of the folder inside of targets /src/targets/shop.product.variants.render-before.
cd quickstart
npx shop-minis dev --extension-targets=shop.product.variants.render-before
The following prompt will appear in the terminal:
Local development environment for quickstart is running...

› Press a │ Open on Android device or emulator
› Press i │ Open in iOS simulator

› Press q │ Scan a QR code to open the Mini in the Shop app on your device
› Press h │ Open Minis Docs in browser
To see your Mini extension you will need to access any product on your development stores. See Minis documentation for more details. You must be logged in with a Shop account matching a staff member in your development store.
Having trouble locating your extension?
If you're having trouble locating your Shop Mini extension after following the setup steps, here are a few things to check:
Correct target: Ensure you've selected the correct extension target when creating your extension. Different targets appear in different locations within the Shop app.
Development store: Make sure you're accessing the proper target within your development store. Your Mini extension will only appear in stores, products or orders that you've set up for development.
Login: Verify that you're logged in with a Shop account that belongs to your Shopify organization.
Refresh: Sometimes, you may need to refresh the product page or restart the Shop app to see your changes.
Extension visibility: Check
render.tsxif your extension's render function is returning a component. If it's not rendering anything (returning null), your extension won't be visible.Connection issues: Ensure that you have a stable internet connection. You can add
--host localhostto yourshop-minis devcommand to test your Mini locally.
If you've checked all these points and still can't see your Mini, consider reaching out to Shop Minis support for further assistance.
Submit your Mini
Once you're ready, you should submit your Mini normally by following the steps in publishing.