Building a Shoppable Posts mini
What will you learn?
In this guide, you'll learn how to do the following:
- Accept data from an entry point.
- Render a list of posts.
- Show products connected to each post.
Prerequisites
This guide assumes that you have your test store set up and are able to create entry points but mock data will be provided if you are just getting started. You could alternatively fetch this data from your own API if you wish.
Step 1: Set up your entry point
The first thing to do is to create an entry point with a list of posts and associated products. For this example I will be using the data that comes from the STORE_PAGE IMAGE_COLLECTION_V2 entry point.
For development purpose, we have included mocked data which populates the mini with a few posts and associated products. We advise you to use this mock data to get started and then switch to using the real entry points data once you have set up your entry point(s).
You can create an entry point for this guide like so:
mutation SetEntryPoint {
  entryPointSetByOwner(
    shopDomain: "shop-minis-test-store.myshopify.com",
    location: PRODUCT_PAGE,
    ownerId: "gid://shopify/Product/7541934391551",
    input: {
      imageCollectionV2:{
        items:[
          {
            image: {
              url: "https://cdn.shopify.com/s/files/1/0621/0463/3599/products/vin-stratton-V1dX9O1B4pM-unsplash_990x.jpg?v=1651847754"
            },
            relatedProducts: [
              {productId: "gid://shopify/Product/7922587762943"},
              {productId: "gid://shopify/Product/7541927510271"},
              {productId: "gid://shopify/Product/7541934391551"},
            ],
            description: "Lorem ipsum dolor sit amet, consectetur adipiscing elit, sed do eiusmod tempor incididunt ut labore et dolore magna aliqua.",
            displayDate: "2022-08-15T13:30:00Z",
            externalId: "1",
          },
          # ... other items
        ]
      }
    }
  ) {
    entryPoint {
      id
      ownerId
      visibilityRule
    }
  }
}
Step 2: Reading entry point data
In your mini you can now use the useMinisParams() hook to get hold of entryPoint.collectionItems.
When a mini is launched from a VIDEO_COLLECTION_V2 or
IMAGE_COLLECTION_V2 entry point this object will contain all of
the entry point items. We can use that for our first page of data instead of fetching it from an API which will help
our mini first load to feel fast and responsive. Subsequent pages of data will need to be fetched from elsewhere and
it's result should return in the fetchMoreByProductIds or fetchMoreByShopId property.
Check out the ShoppablePosts template properties for more information.
- HomeScreen.tsx
import {useMinisParams, ShoppablePosts, ImageCollectionV2EntryPointItem} from '@shopify/shop-minis-platform-sdk'

export const ShoppablePostsScreen = () => {
  const {entryPoint} = useMinisParams()

  const shoppablePosts = useMemo(
    // This is a helper function that maps the entry point items to the ShoppablePostsItem type
    () => mapEntryPointCollectionItemsToShoppablePosts(entryPoint.collectionItems),
    [entryPoint.collectionItems]
  )

  const fetchMoreByProductIds = useCallback((productIds: string[]) => {
    // Fetch more posts from your API based on the productIds
    return fetchMorePostsFromServer(productIds)
  }, [])

  const fetchMoreByShopId = useCallback((shopId: string) => {
    // Fetch more posts from your API by shopId
    return fetchMorePostsFromServer(shopId)

  }, [])

  return (
    <ShoppablePosts
      items={shoppablePosts}
      shopId={entryPointParams.shopGID}
      fetchMoreByProductIds={fetchMoreByProductIds}
      fetchMoreByShopId={fetchMoreByShopId}
    />
  )
}

function mapEntryPointCollectionItemsToShoppablePosts(
  collectionItems: ImageCollectionV2EntryPointItem[]
) {
  return collectionItems.map(item => ({
    externalId: item.externalId!,
    description: item.description!,
    displayDate: item.displayDate!,
    image: {url: item.image.url},
    relatedProductsIds: item.relatedProducts.map(
      relatedProduct => relatedProduct.productId
    ),
  }))
}
As mentioned above mock data is provided if you cannot use entry point data yet. Just import entryPoint and entryPointParams from mockData.ts instead of using useMinisParams(). This mock data assumes you are using enableApiSandbox so toggle that back on if you previously disabled it.
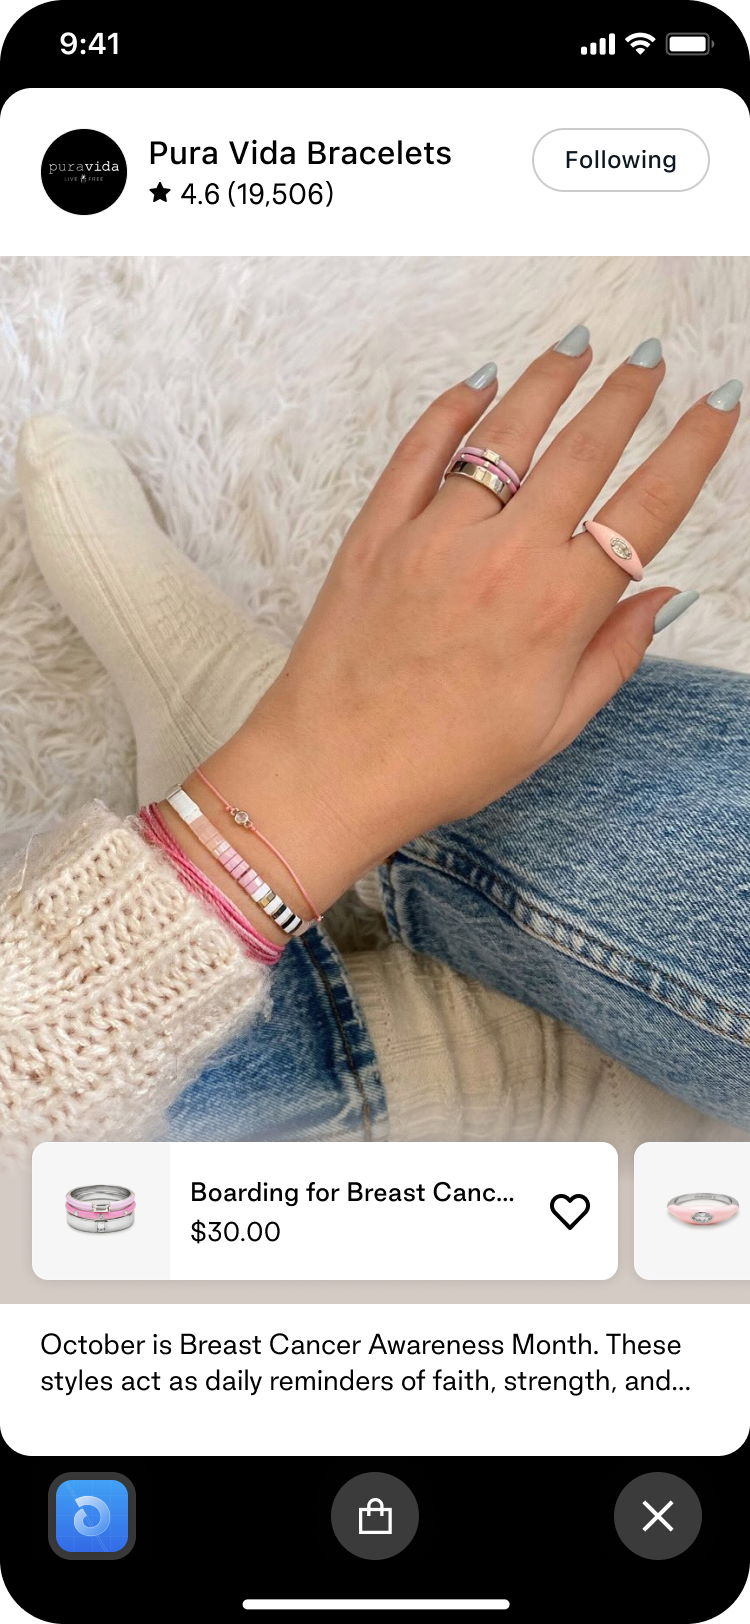
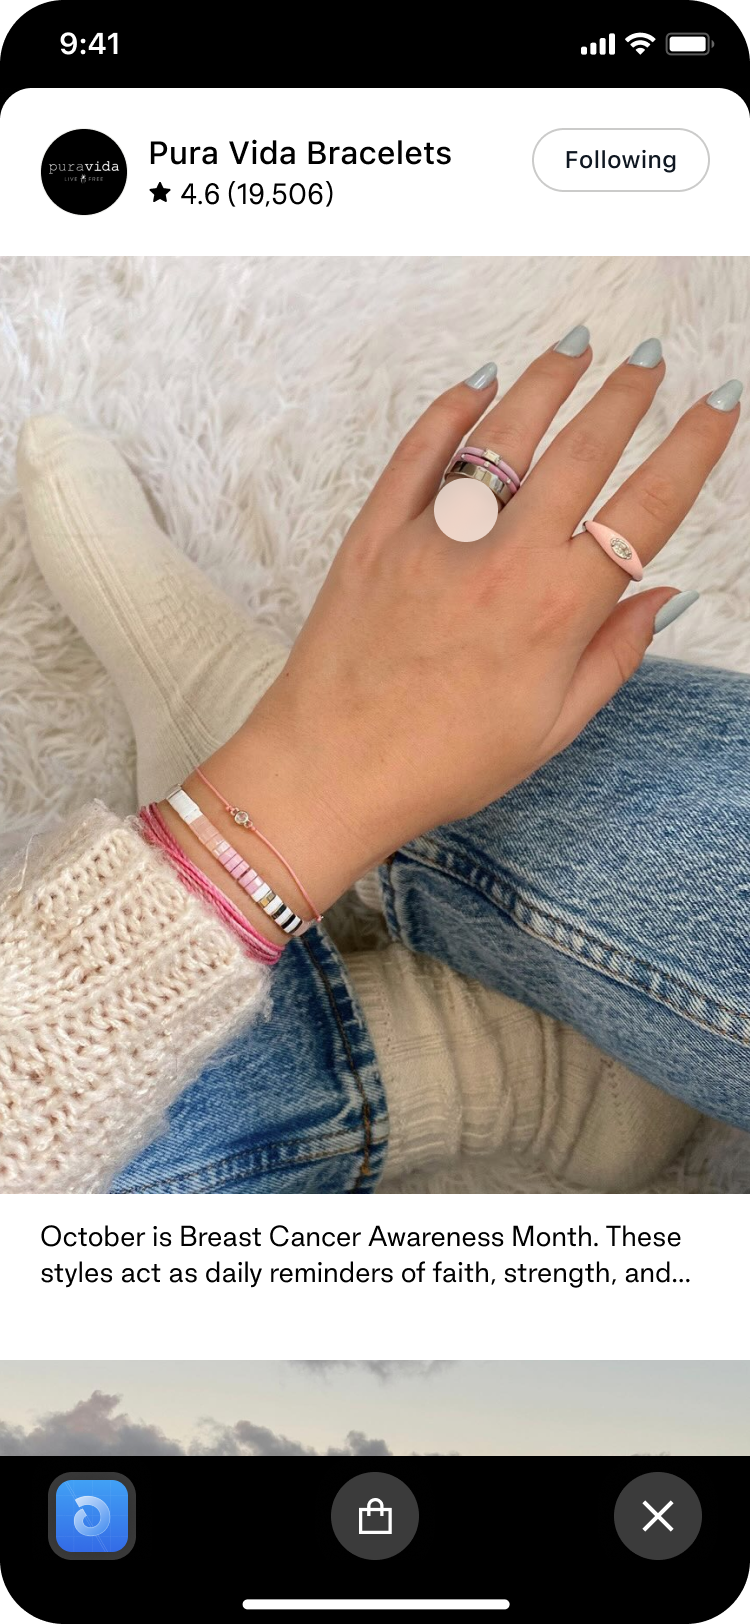
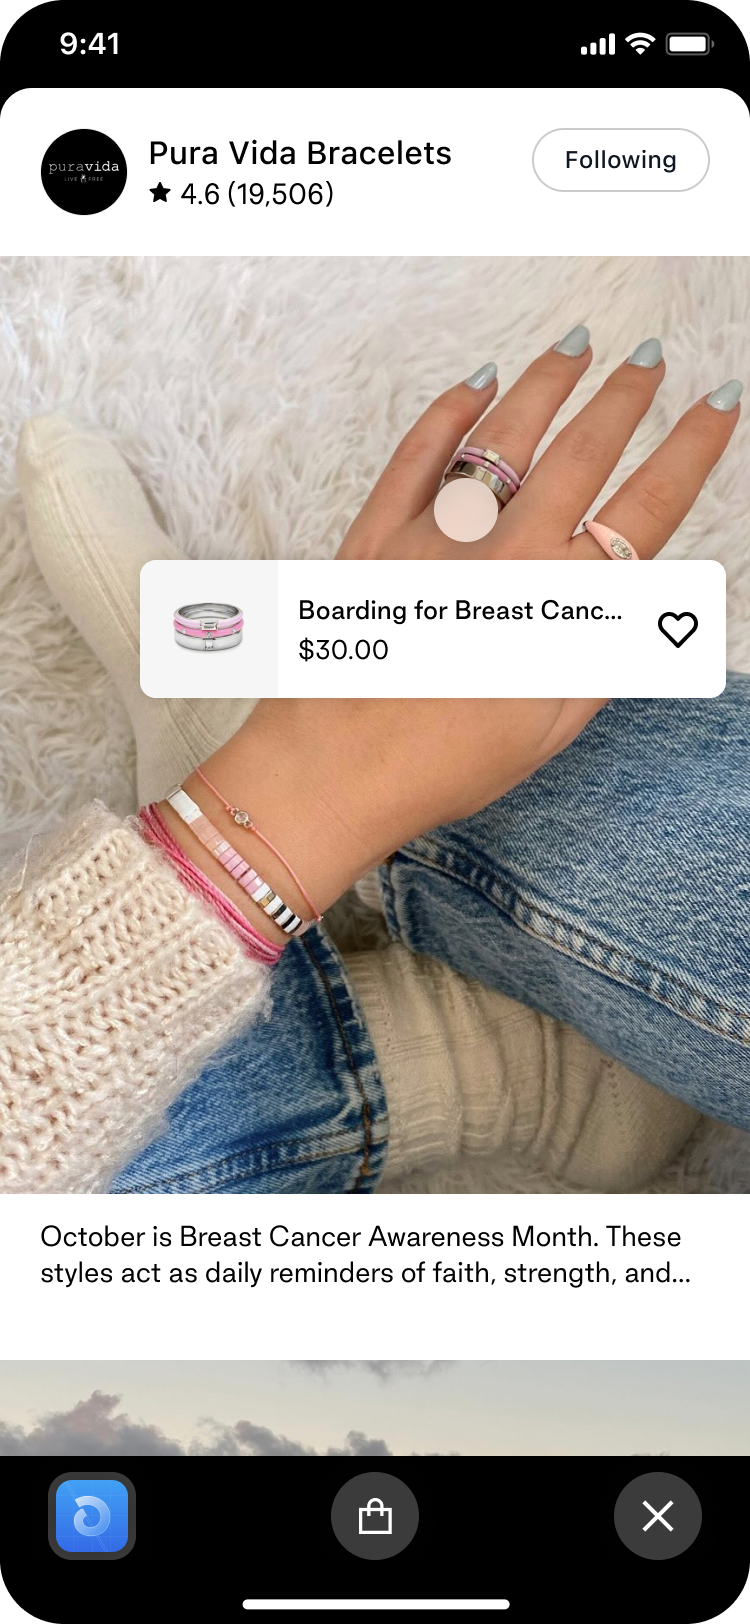
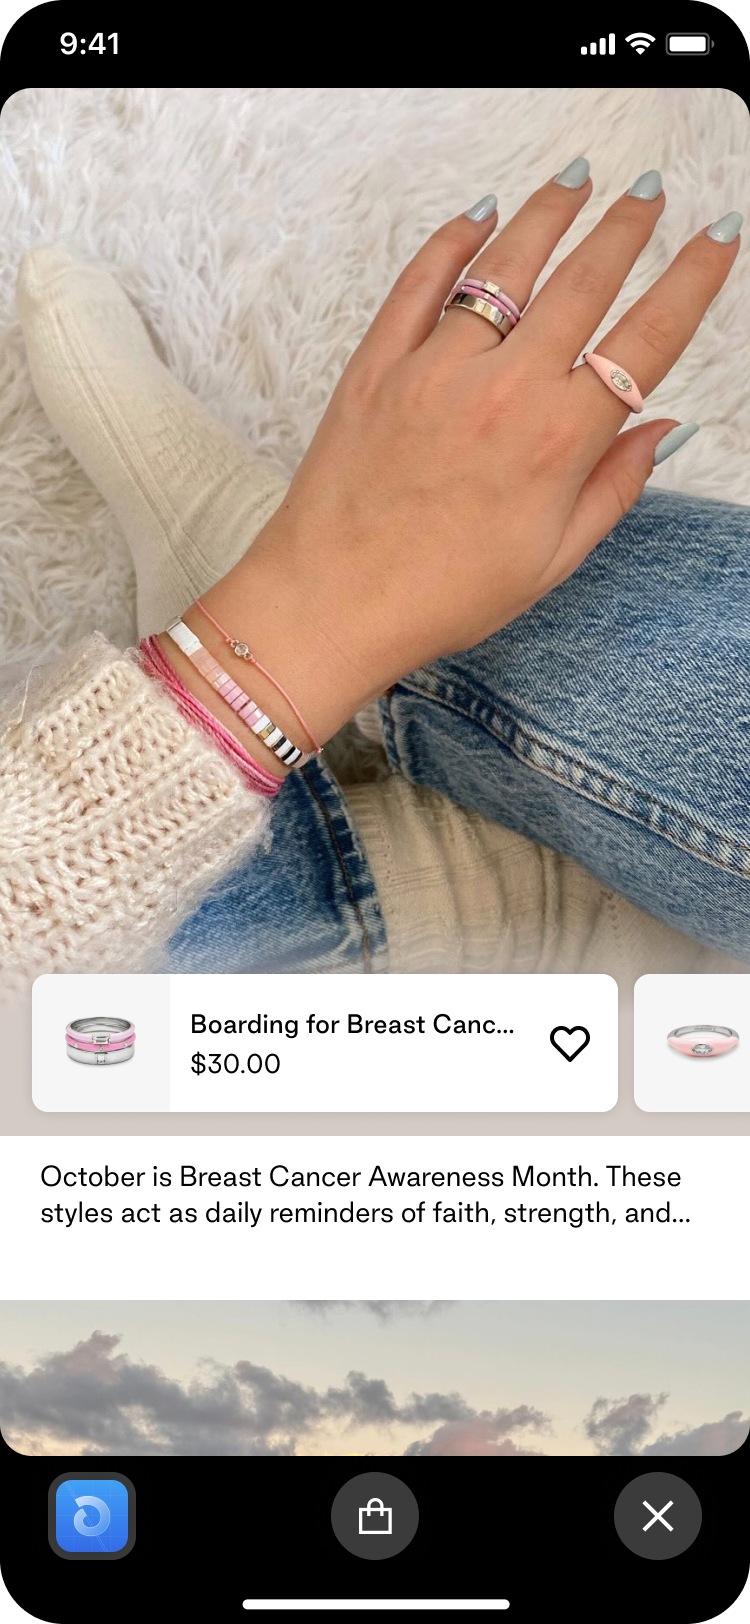
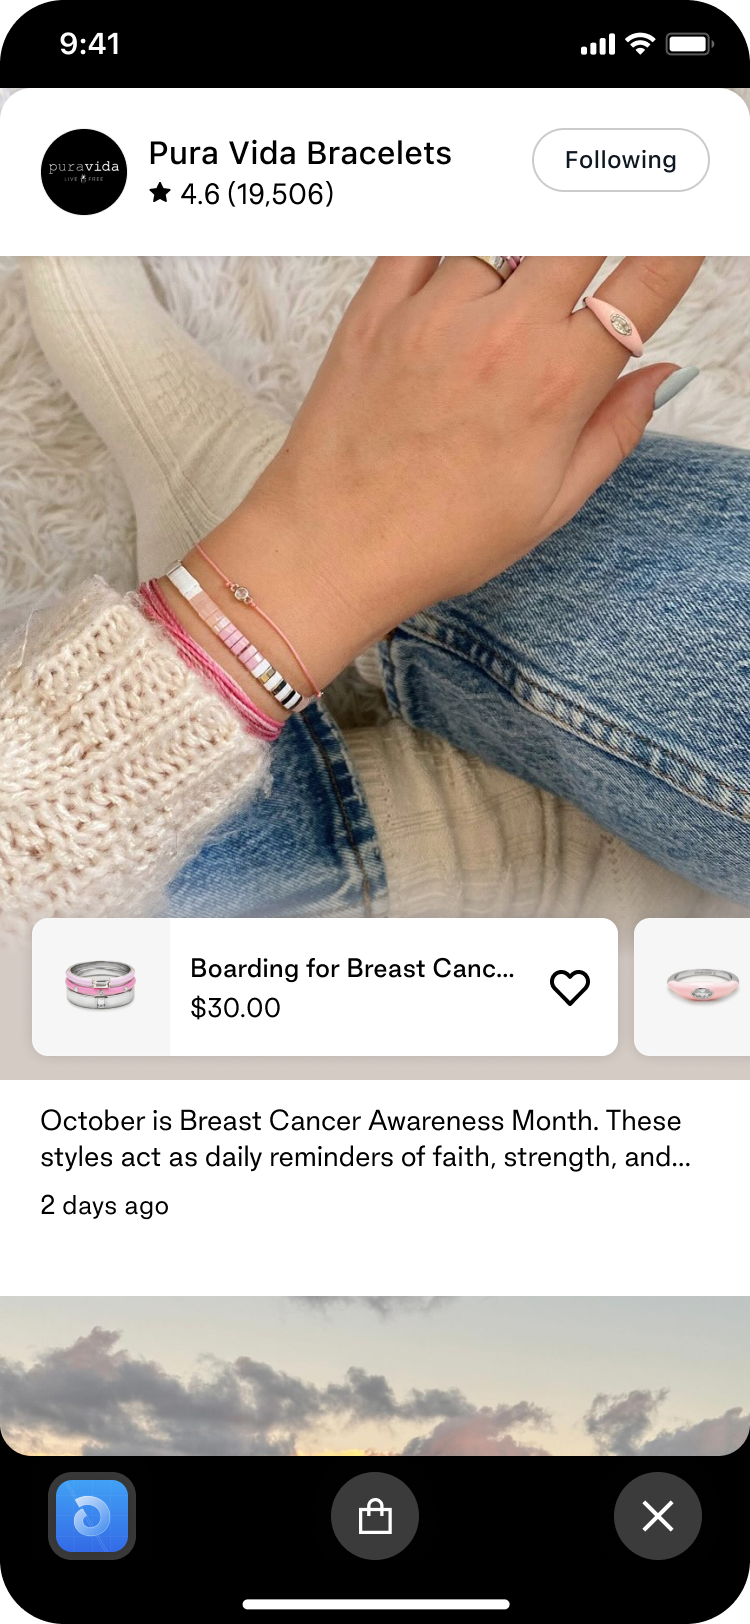
Step 3: Rendering a list of posts
The result you'll get with this data is a list of posts that look like this:
Step 4: Customizing your Shopable Posts mini
You can customize the look and feel of your Shoppable Posts mini by using the ShoppablePosts component's props.
You can find the full list of props here: ShoppablePostsCustomisationProps.
Example
// ...
<ShoppablePosts
  items={shoppablePosts}
  shopId={entryPointParams.shopGID}
  fetchMoreByShopId={fetchMoreByShopId}
  renderMedia={({item}) => <CustomCarouselPost images={[imageStack(item.image.url)]} />}
/>
// ...

// ...
<ShoppablePosts
  items={shoppablePosts}
  shopId={entryPointParams.shopGID}
  fetchMoreByShopId={fetchMoreByShopId}
  renderItem={({item}) => (
    <View>
      <Image
        source={{uri: item.image.url}}
        style={{width: '100%', height: 500}}
        resizeMode="cover"
      />
      <Pressable
        onPress={() => setShouldShow(!shouldShow)}
        style={{
          height: 20,
          width: 20,
          borderRadius: 20,
          position: 'absolute',
          backgroundColor: '#c3c3c3',
          borderWidth: 1,
          borderColor: '#ffffff',
          top: 280,
          left: 100,
        }}
      >
        {shouldShow ? (
          <View
            style={{
              position: 'absolute',
              top: 10,
              left: 20,
              width: 200,
              height: 200,
            }}
          >
            <ProductLink
              product={FIXTURE_PRODUCT}
              shopId={entryPointParams.shopGID}
            />
          </View>
        ) : null}
      </Pressable>
    </View>
  )}
/>
// ...
// ...
<ShoppablePosts
  items={shoppablePosts}
  shopId={entryPointParams.shopGID}
  fetchMoreByShopId={fetchMoreByShopId}
  renderHeader={() => null}
/>
// ...
// ...
<ShoppablePosts
  items={shoppablePosts}
  shopId={entryPointParams.shopGID}
  fetchMoreByShopId={fetchMoreByShopId}
  renderMediaFooter={({item}) => (
    <Box flexDirection="column" margin="gutter">
      <Text variant="bodySmall">{item.description}</Text>
      <DisplayDate date={item.displayDate} />
    </Box>
  )}
/>
// ...
We look forward to seeing what you build!